Extensible Color Palette (Gradient Maps) Now with Palette Blending!
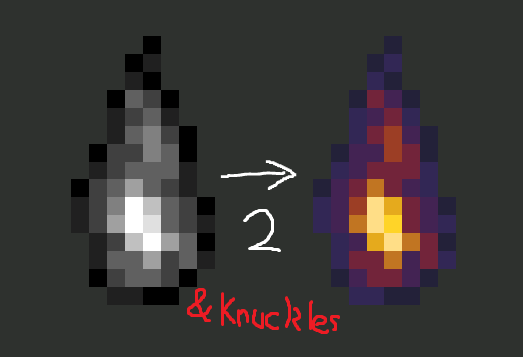
This shader converts a greyscale image into a palette controlled image.
Works for Godot 4.x in its current state, see the *NOTE for functionality with Godot 3.x
How to use:
1. Apply the shader to your image/Node in question.
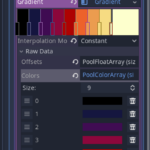
2. Make sure to add in gradient textures to the pal0 and pal1 uniforms
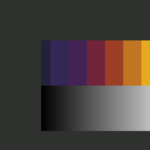
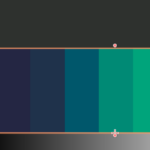
3. Use the offsets under the gradients to tell the shader what brightness to look for when picking a color.
-Pick your custom colors to map onto your texture.
Now, move the “lerper” slider. Your color should smoothly change from the first palette to the second, and vice versa!
Here’s a treat, you don’t have to edit shader code unless you want to. Everything should be extensible from the shader’s gradient texture parameters.
It (maybe) couldn’t be more simple.
*NOTE for Godot 3.x (GLES 2 & GLES 3) users:
-If you want this to work in Godot 3.x, replace the “hint_default_black” in the pal0 and pal1 uniforms with “hint_albedo”
-Requires Godot 3.5 if you want the new “constant” gradient type.
-uploaded on August 18, 22-
This was made as an alternative to my other shader, which uses multiple individual uniforms as colors instead of gradients. This made it easier to change and tween the colors individually within GDScript.
-Jan 12, 2023-
Figured out that my old shader isn’t antequated. It is easier to directly influence the colors with tweens or other functions when images, such as gradients, don’t have the same functionality.
-June 17, 2023-
I hacked together a solution for Gradients that gives tween-like behavior. Have a “from” palette and a “to” palette, with a slider that can mix between the two with some (hopefully) simple GDScript.
Shader code
shader_type canvas_item;

uniform sampler2D pal0 : hint_default_black;
uniform sampler2D pal1 : hint_default_black;

uniform float lerper: hint_range(0.0, 1.0);


vec3 c_lerp(vec4 c1, vec4 c2, float pos) {
	pos = clamp (pos, 0.0, 1.0);
	return vec3(c1.x*pos + c2.x*(1.0-pos),c1.y*pos + c2.y*(1.0-pos),c1.z*pos + c2.z*(1.0-pos));
}

void fragment() {

	vec3 tex_uv = vec3(UV, 0.0);
	vec3 color_input;
	float alpa_input;

	// Get the colors from the image at specified location

	{
		vec4 _tex_read = textureLod(TEXTURE, tex_uv.xy, 0.0);
		color_input = _tex_read.rgb;
		alpa_input = _tex_read.a;
	}

	// get the greyscale value through the highest of r, g, and b

	float grey_value;
	{
		vec3 c = color_input;
		float max1 = max(c.r, c.g);
		float max2 = max(max1, c.b);
		grey_value = max2;
	}

	// Read the colormap and use the greyscale value to map in the new colors for each palette.

	vec4 colorP0 = textureLod(pal0, vec2(grey_value, 0.0), 0.0);

	vec4 colorP1 = textureLod(pal1, vec2(grey_value, 0.0), 0.0);

	// Blend between your two color maps and...   Profit.

	COLOR = vec4(c_lerp(colorP1, colorP0, lerper), COLOR.w);
}




Hi.
How does it differs from the WorldEnvironment Color Correction adjustment?
Well, for starters you can integrate this in any shader you write. World environment color correction would affect the entire screen instead of just one material.