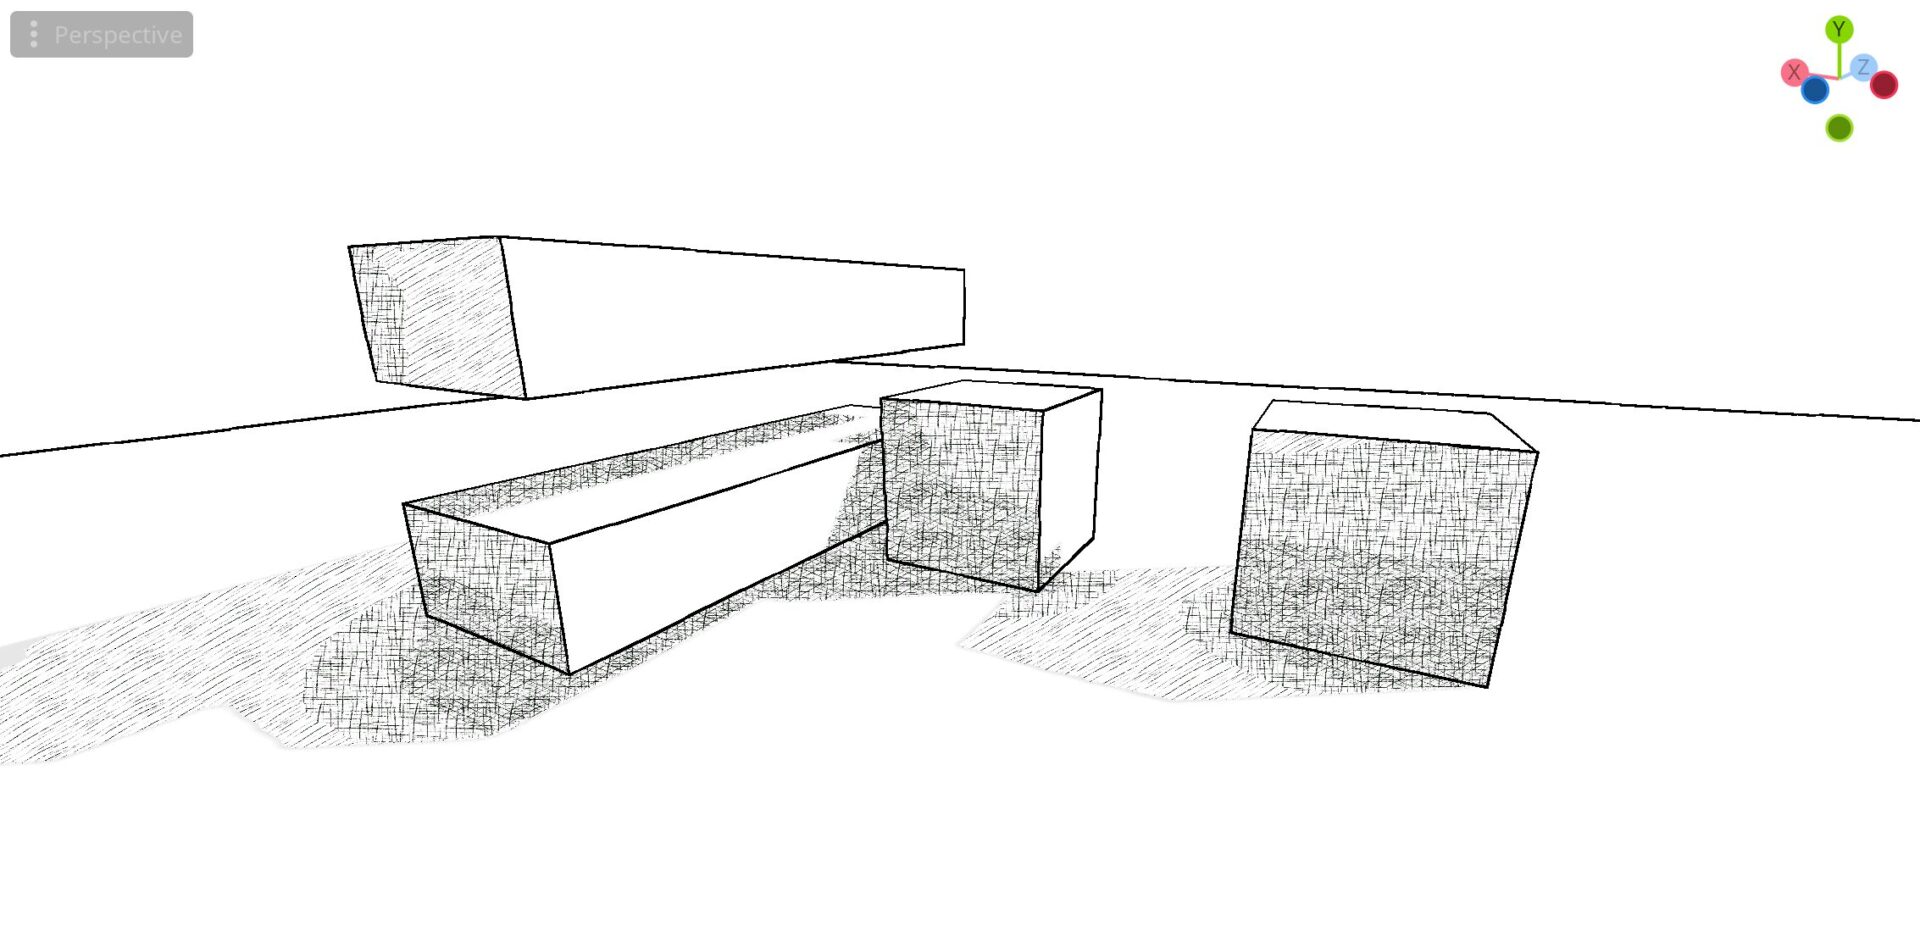

Mobius Outline + Hatching
I saw tlaverne covered this already and this is my version.
Original Video:Moebius-style 3D Rendering | Useless Game Dev – YouTube
Shader code
shader_type spatial;
render_mode unshaded,vertex_lighting;

uniform sampler2D depth_texture : hint_depth_texture,filter_linear_mipmap;
uniform sampler2D normal_texture : hint_normal_roughness_texture,filter_linear_mipmap;
uniform sampler2D screen_texture: hint_screen_texture,filter_linear_mipmap;


uniform vec3 edge_color : source_color = vec3(0.0, 0.0, 0.0);
uniform float edge_threshold: hint_range(0.001, 0.2, 0.001) = 0.01;

uniform sampler2D hatch1: filter_nearest,repeat_enable;
uniform sampler2D hatch2: filter_nearest,repeat_enable;
uniform sampler2D hatch3: filter_nearest,repeat_enable;


uniform float noise_frequency : hint_range(0.1, 20.0, 0.1)= 10.0 ;
uniform float noise_offset_intensity : hint_range(0.0, 0.2, 0.001) = 0.002;


vec2 hash(vec2 p) {
    p = vec2(dot(p, vec2(127.1, 311.7)),
             dot(p, vec2(269.5, 183.3)));
    return -1.0 + 2.0 * fract(sin(p) * 43758.5453123);
}

vec2 fade(vec2 t) {
    return t * t * t * (t * (t * 6.0 - 15.0) + 10.0);
}

float grad(vec2 hash, vec2 dir) {
    vec2 grad_dir = vec2(hash.x * 2.0 - 1.0, hash.y * 2.0 - 1.0);
    return dot(grad_dir, dir);
}

float perlin(vec2 pos) {
    vec2 p = floor(pos);
    vec2 f = fract(pos);

    f = fade(f);

    vec2 top_left = p;
    vec2 top_right = p + vec2(1.0, 0.0);
    vec2 bottom_left = p + vec2(0.0, 1.0);
    vec2 bottom_right = p + vec2(1.0, 1.0);

    float tl = grad(hash(top_left), f);
    float tr = grad(hash(top_right), f - vec2(1.0, 0.0));
    float bl = grad(hash(bottom_left), f - vec2(0.0, 1.0));
    float br = grad(hash(bottom_right), f - vec2(1.0, 1.0));

    float top = mix(tl, tr, f.x);
    float bottom = mix(bl, br, f.x);
    return mix(top, bottom, f.y);
}


void vertex(){

	POSITION = vec4(VERTEX.xy,1.0,1.0);
}

void fragment() {
	vec2 screen_uv = SCREEN_UV;
	vec3 origin_color = texture(screen_texture,screen_uv).rgb;

    // 获取当前位置的Perlin噪声值
    vec2 noiseValue = vec2(perlin(screen_uv * noise_frequency), perlin((screen_uv + vec2(0.5, 0.5)) * noise_frequency));  // 10.0是频率,可以调整

    // 使用噪声值偏移uv
    vec2 uv = screen_uv + noiseValue * noise_offset_intensity;  // 0.02是偏移强度,可以根据需要调整
	float dx = 1.0 / VIEWPORT_SIZE.x;
	float dy = 1.0 / VIEWPORT_SIZE.y;
	mat3 Gx = mat3(
				vec3(-1, -2, -1),
				vec3( 0,  0,  0),
				vec3( 1,  2,  1)
	);

	mat3 Gy = mat3(
			vec3(-1, 0, 1),
			vec3(-2, 0, 2),
			vec3(-1, 0, 1)
	);

    float depthSobelX = 0.0;
    float depthSobelY = 0.0;

    float normalSobelX = 0.0;
    float normalSobelY = 0.0;

    for(int i = -1; i <= 1; i++) {
        for(int j = -1; j <= 1; j++) {
			float depth = texture(depth_texture, uv + vec2(float(i) * dx, float(j) * dy)).r;
			vec3 normal = normalize(texture(normal_texture, uv + vec2(float(i) * dx, float(j) * dy)).rgb * 2.0 - 1.0);
			depthSobelX += Gx[i+1][j+1] * depth;
			depthSobelY += Gy[i+1][j+1] * depth;
			normalSobelX += Gx[i+1][j+1] * normal.x;
			normalSobelY += Gy[i+1][j+1] * normal.y;
        }
    }

    float depthMagnitude = length(vec2(depthSobelX, depthSobelY));
    float normalMagnitude = length(vec2(normalSobelX, normalSobelY));

    // Combine the results
    float magnitude = depthMagnitude + normalMagnitude;


	// distort the hatching
	vec3 normal_sample = normalize(texture(normal_texture, uv).rgb * 2.0 - 1.0);
	vec2 distorted_uv = uv + normal_sample.xy * 2.0 ;


	vec3 screen_color = texture(screen_texture,uv).rgb;
	float luminance = dot(screen_color, vec3(0.299, 0.587, 0.114));

	vec4 texture_color;
	if (luminance < 0.6){
		texture_color = texture(hatch3,distorted_uv * 20.0);

	}
	else if (luminance < 0.7){
		texture_color = texture(hatch2,distorted_uv * 20.0);
	}
	else if (luminance < 0.8){
		texture_color = texture(hatch1,distorted_uv * 20.0);
	}
	else{
		texture_color = texture(screen_texture,uv);
	}
    if (magnitude > edge_threshold) {
        ALBEDO = edge_color;
    } else {
        // 使用纹理颜色
        ALBEDO = texture_color.rgb;
    }

}


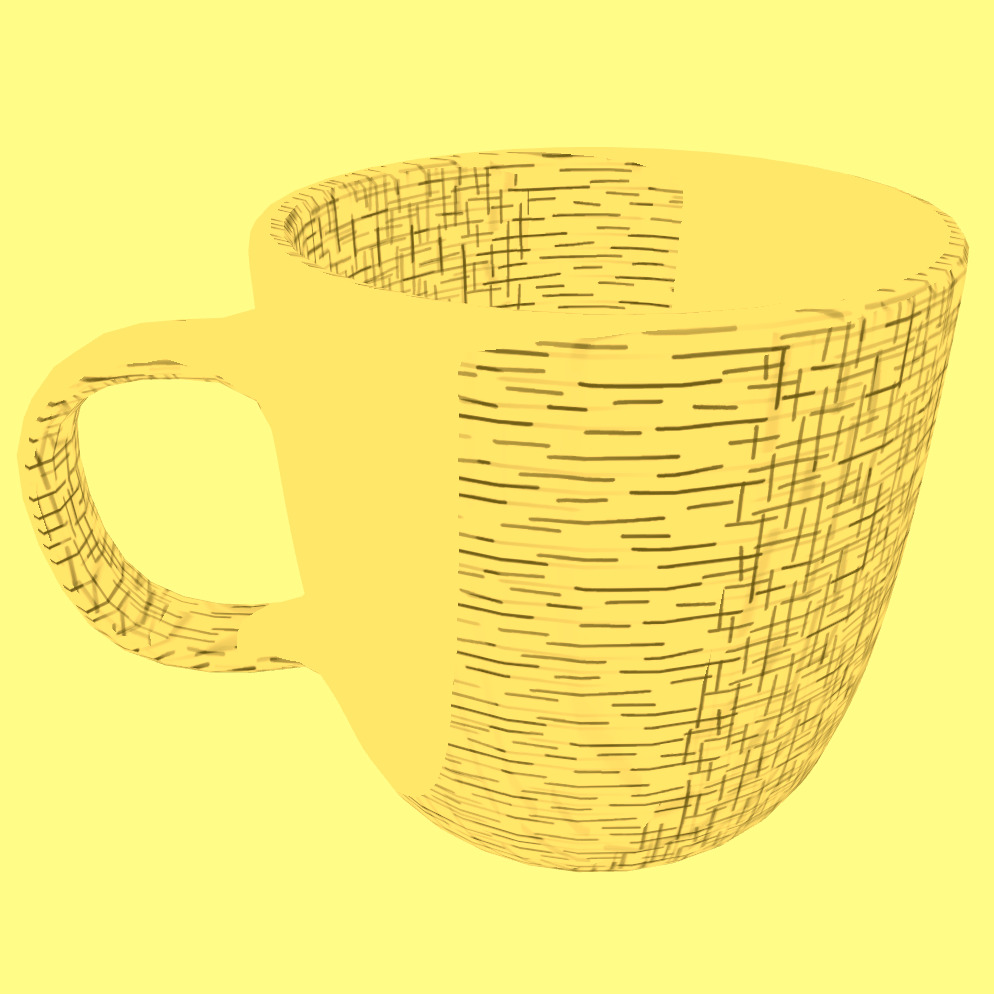
Thank you very much, it looks great on the pictures! but it doesn’t work for me, im applying it to a quad in front of the 3d camera but I can’t seem to increase the outline thickness and would like to know how to set up the hatches, please. And thank you
what’s your Godot Version? is it 4.3?