
CRT with Luminance Preservation (no scanlines)
A fairly realistic CRT shader made with the intent of trying to get as close as possible to a real CRT on my 1080p monitor. It features screen curvature, various phosphor arrangements, adjustable color misalignment, and more!
This is a modification of my own CRT with Luminance Preservation but without the scanlines, as they can cause problems with scaling and create Moiré patterns which forces the render resolution to be quite low. With this shader, that is no longer an issue (although you miss out on the cool scanline effects). I would still recommend using a lower resolution with this, but unlike my previous version you can go all the way up to 720 and it still looks okay.
There’s a lot going on here, but one of the main underlying principals is luminance preservation, which means that an image passed into the shader will be roughly as bright as the result (and without any significant changes in saturation or contrast either). I do this by making the patterns most visible in the midtones but letting them disappear in highlights.
This all enables me to make artistic decisions about lighting and color for my project that wouldn’t be significantly different for players who turn off the CRT filter.
Setup & Explanation:
This should use a texture smaller than your screen’s resolution (CRT shaders simply look better this way), so the usual “hint_screen_texture” won’t be helpful here, and you should set the “tex” parameter as a ViewportTexture, and connect the texture’s viewport path to a SubViewport which has the camera and all 2D and 3D elements that you want filtered set as children of the SubViewport. Your material should be on a ColorRect that is a sibling of the SubViewport.
It might help to think of your SubViewport like a stage. Child nodes of the SubViewport are like props and actors on the stage. Your ViewportTexture is like a video feed of that stage (and for 3D elements, you need a camera for that video feed to work).
The size of your texture is controlled by your Subviewport. Some heights used in older games include 240, 480, or 720, but you can use whatever you want. Because pixels are softened, most arbitrary sizes will work pretty well.
Fixing Mouse Input:
In order to use the mouse with this effect, you’re going to need the script below or something similar. It will remap the mouse coordinates and pass input to nodes inside of the SubViewport.
# Put this script onto the ColorRect you're using to display the CRT effect
extends Control

# The SubViewport that will be rendered onto the CRT
@export var subviewport_node: SubViewport

# The default mouse filter for a ColorRect (stop) will stop this script from
# working, and it needs to be set to pass or ignore (both work).
# You can also just set this yourself and remove this function.
func _ready():
	mouse_filter = Control.MOUSE_FILTER_PASS

func _unhandled_input(event: InputEvent):

	if event is InputEventMouse:

		# Remap the coorinates of a mouse event to be at an apropriate point
		event.position -= position
		event.position *= Vector2(Vector2(subviewport_node.size) / size)

	subviewport_node.push_input(event)
Before doing a full setup, I’d recommend starting with a mostly blank scene with just a ColorRect with a CRT ShaderMaterial on it, and set the tex parameter as a static test image. You can use this to quickly experiment and see if the shader fits your project.
Quick Setup:
1: Create a ColorRect. Under layout, set Anchors Preset to “Full Rect”.
2: Create a new shader material for the ColorRect, set its shader to my CRT shader.
3: Create a SubViewport (I make it a sibling of the ColorRect). Almost everything else should be a child of the SubViewport.
4: After creating the SubViewport, go back to the material on the ColorRect. Right click the tex parameter and create new ViewportTexture. It will prompt you to select a SubViewport. There should be only the one you made earlier. Select that one.
5: Adjust the size of the ViewportTexture with the SubViewport.
You can use a basic texture rect to display with texture without any CRT effect. The color rect and texture rect can then be enabled/disabled by a button in your options menu to let users toggle the effect.
Shader code
// CRT with Luminance Preservation (no scanlines) by Harrison Allen
// Public domain
shader_type canvas_item;
render_mode unshaded;
/**
The input texture that will have the CRT effect applied to it.
This should be supplied by a subviewport texture rendered at a lower res.
*/
uniform sampler2D tex: filter_linear;
/**
Set the type of mask this CRT will have.
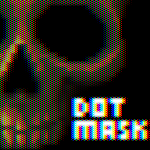
Dots: emulates a typical PC CRT monitor.
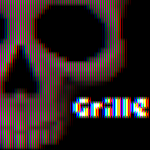
Grille: emulates an aperture grille. Good with higher curve values.
Wide Grille: more suitable for 4k monitors.
Soft Grille: very close to wide grille, but a little softer.
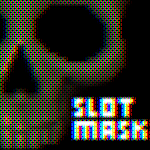
Slot mask: this is the pattern found on most TV sets and arcade cabnets
*/
uniform int mask_type : hint_enum(
"Dots:1",
"Aperture Grille:2",
"Wide Grille:3",
"Wide Soft Grille:4",
"Slot Mask:5",
"Null:0") = 1;
uniform float curve : hint_range(0.0, 0.5) = 0.0;
/**
Use to offset color channels from each other.
Make sure to increase this at least a little because it's a cool effect
*/
uniform float color_offset : hint_range(-0.5, 0.5) = 0.0;
/**
Reduce to preserve phosphor mask details in highlights at the cost of
overall brightness. This should usually be kept at or near 1
*/
uniform float mask_brightness : hint_range(0, 1) = 1.0;
/**
This should be the input texture's height divided by width.
Only important if curve is used.
For 16:9, this should be 0.5625.
*/
uniform float aspect : hint_range(0.5, 1.0) = 0.75;
vec2 warp(vec2 uv, float _aspect, float _curve)
{
// Centralize coordinates
uv -= 0.5;
uv.x /= _aspect;
// Squared distance from the middle
float warping = dot(uv, uv) * _curve;
// Compensate for shrinking
warping -= _curve * 0.25;
// Warp the coordinates
uv /= 1.0 - warping;
uv.x *= _aspect;
// Decentralize the coordinates
uv += 0.5;
return uv;
}
vec3 linear_to_srgb(vec3 col)
{
return mix(
(pow(col, vec3(1.0 / 2.4)) * 1.055) - 0.055,
col * 12.92,
lessThan(col, vec3(0.0031318))
);
}
vec3 srgb_to_linear(vec3 col)
{
return mix(
pow((col + 0.055) / 1.055, vec3(2.4)),
col / 12.92,
lessThan(col, vec3(0.04045))
);
}
// Get color from coordinates (returns in linear color)
vec3 sample(vec2 uv)
{
// Set coordinates to match texture dimensions
uv *= vec2(textureSize(tex, 0));
// Vertical coordinate scanline samples
int y = int(uv.y + 0.5) - 1;
float x = floor(uv.x);
// Horizontal coordinates for the left and right texture samples
float ax = x - 1.0;
float dx = x + 1.0;
// Sample the texture at various points
vec3 upper_a = texelFetch(tex, ivec2(int(ax), y), 0).rgb;
vec3 upper_b = texelFetch(tex, ivec2(int(x), y), 0).rgb;
vec3 upper_c = texelFetch(tex, ivec2(int(dx), y), 0).rgb;
// Adjust the vertical coordinate for the lower scanline
y += 1;
// Sample the texture at various points
vec3 lower_a = texelFetch(tex, ivec2(int(ax), y), 0).rgb;
vec3 lower_b = texelFetch(tex, ivec2(int(x), y), 0).rgb;
vec3 lower_c = texelFetch(tex, ivec2(int(dx), y), 0).rgb;
// Convert every sample to linear color
upper_a = srgb_to_linear(upper_a);
upper_b = srgb_to_linear(upper_b);
upper_c = srgb_to_linear(upper_c);
lower_a = srgb_to_linear(lower_a);
lower_b = srgb_to_linear(lower_b);
lower_c = srgb_to_linear(lower_c);
// The x coordinates of electron beam offsets
vec3 beam = vec3(uv.x - 0.5);
beam.r -= color_offset;
beam.b += color_offset;
// Calculate weights
vec3 weight_a = smoothstep(1, 0, (beam - ax));
vec3 weight_b = smoothstep(1, 0, abs(beam - x));
vec3 weight_c = smoothstep(1, 0, (dx - beam));
vec3 upper_col = (
upper_a * weight_a +
upper_b * weight_b +
upper_c * weight_c
);
// Mix samples into the lower scanline color
vec3 lower_col = (
lower_a * weight_a +
lower_b * weight_b +
lower_c * weight_c
);
// Vertical sawtooth wave used to generate scanlines
// Almost the same as fract(uv.y + 0.5), but prevents a rare visual bug
float sawtooth = (uv.y + 0.5) - float(y);
// Smoothstep the sawtooth wave
sawtooth = smoothstep(0, 1, sawtooth);
vec3 combined = mix(upper_col, lower_col, sawtooth);
return combined;
}
// Returns the slotmask pattern in RGB plus a fourth value for avg. brightness
vec4 generate_mask(vec2 fragcoord)
{
switch (mask_type)
{
case 1: // Dots
const vec3 pattern[] = {vec3(1,0,0), vec3(0,1,0), vec3(0,0,1), vec3(0,0,0)};
ivec2 icoords = ivec2(fragcoord);
return vec4(pattern[(icoords.y * 2 + icoords.x) % 4], 0.25);
case 2: // Grille
const vec3 pattern[] = {vec3(0,1,0), vec3(1,0,1)};
return vec4(pattern[int(fragcoord.x) % 2], 0.5);
case 3: // Wide grille
const vec3 pattern[] = {
vec3(1,0,0), vec3(0,1,0), vec3(0,0,1), vec3(0,0,0)};
return vec4(pattern[int(fragcoord.x) % 4], 0.25);
case 4: // Grille wide soft
const vec3 pattern[] = {
vec3(1.0,0.125,0.0),
vec3(0.125,1.0,0.125),
vec3(0.0,0.125,1.0),
vec3(0.125,0.0,0.125)};
return vec4(pattern[int(fragcoord.x) % 4], 0.3125);
case 5: // Slotmask
const vec3 pattern[] = {
vec3(1,0,1), vec3(0,1,0), vec3(1,0,1), vec3(0,1,0),
vec3(0,0,1), vec3(0,1,0), vec3(1,0,0), vec3(0,0,0),
vec3(1,0,1), vec3(0,1,0), vec3(1,0,1), vec3(0,1,0),
vec3(1,0,0), vec3(0,0,0), vec3(0,0,1), vec3(0,1,0)
};
ivec2 icoords = ivec2(fragcoord) % 4;
return vec4(pattern[icoords.y * 4 + icoords.x], 0.375);
default:
return vec4(0.5);
}
}
// Apply phosphor mask/grill
vec3 apply_mask(vec3 linear_color, vec2 fragcoord)
{
// Get the pattern for the mask. Mask.w equals avg. brightness of the mask
vec4 mask = generate_mask(fragcoord);
// Dim the color if brightness is reduced to preserve mask details
linear_color *= mix(mask.w, 1.0, mask_brightness);
// How bright the color needs to be to maintain 100% brightness while masked
vec3 target_color = linear_color / mask.w;
// Target color limited to the 0 to 1 range.
vec3 primary_col = clamp(target_color, 0.0, 1.0);
// Calculate how bright the secondary subpixels will need to be
vec3 secondary = target_color - primary_col;
secondary /= 1.0 / mask.w - 1.0;
primary_col *= mask.rgb;
// Add the secondary subpixels
primary_col += secondary * (1.0 - mask.rgb);
return primary_col;
}
void fragment()
{
// Warp UV coordinates
vec2 warped_coords = warp(UV, aspect, curve);
// Sample color
vec3 col = sample(warped_coords);
// Apply phosphor mask
col = apply_mask(col, FRAGCOORD.xy);
// Convert back to srgb
col = linear_to_srgb(col);
COLOR.rgb = col;
}Live Preview

Looks great and got it working with minimal issues 🙂