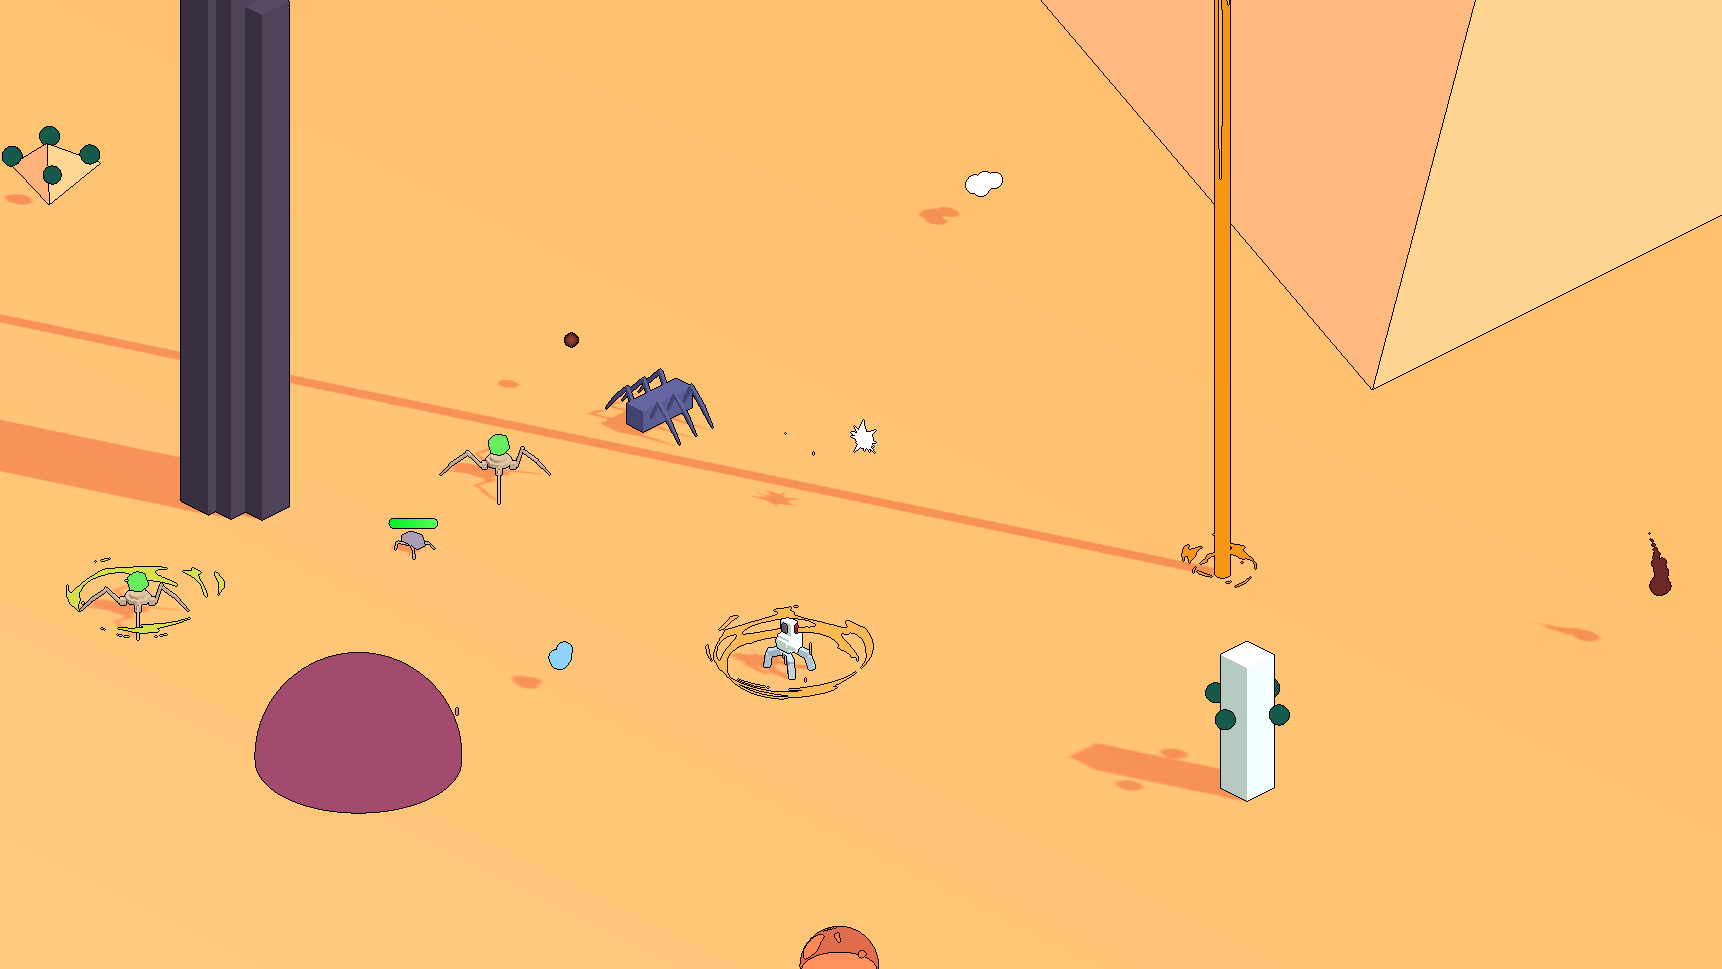
Pixel perfect outlines with full control
You can check an example project here: https://github.com/SimonPiCarter/demo_pixel_outline_godot
The post processing is completely not standard as I don’t rely on the usual quadmesh with screen texture shader because transparent object are not rendered to the screen texture* (I am talking about this technique). Instead I am rendering the scene to a texture (using Viewport and ViewportTexture) and applying a shader to the texture itself (probably less efficient but I did not find any other way).
Then it is when the trickery happens. I actually render my scene to TWO viewports (and two textures) and I use the first shader to render my meshes. See MESH RENDERING SHADER shader code below.
In the MESH RENDERING SHADER you can see that I am rendering different colors depending on the camera visible layers. This is because in one scene I am going to render everything nice with the colors I want to appear on screen but on the other one I just want a unique color for every surface (or blob) I want an edge contour.
Then I use the following shader on the second viewport texture :
shader_type canvas_item;


uniform vec4 outline_color : source_color;
uniform float outline_width = 1.0;
uniform int type : hint_range(0, 2) = 2;
uniform int active : hint_range(0,1) = 1;


const vec2[8] DIRECTIONS = {
    vec2(1.0, 0.0),
    vec2(0.0, 1.0),
    vec2(-1.0, 0.0),
    vec2(0.0, -1.0),
    vec2(1.0, 1.0),
    vec2(-1.0, 1.0),
    vec2(-1.0, -1.0),
    vec2(1.0, -1.0)
};


float gtz(float input) { return max(0, sign(input)); }
// returns 1 if input > 0, else 0


float compute_color_power(vec4 color) {
    return 1000.*color.r + gtz(color.r)*100.
         + 100.*color.g + gtz(color.g)*10.
         + 10.*color.b + gtz(color.b)
         + color.a;
}


float check_color(sampler2D tex, vec2 from, vec2 size) {
    float result = 0.0;
    vec4 ref_color = texture(tex, from);
    float ref_val_color = ref_color.r+ref_color.g+ref_color.b;
    for (int i = 0; i < 4 * type; i++) {
        vec4 color = texture(tex, from + DIRECTIONS[i] * size * outline_width);
        float diff_color = abs(color.r - ref_color.r)
                         + abs(color.g - ref_color.g)
                         + abs(color.b - ref_color.b)
                         + abs(color.a - ref_color.a);
        float val_color = color.r+color.g+color.b;
        float diff = ref_val_color - val_color;
        float abs_diff = abs(diff);
        result += gtz(diff_color) * gtz(abs_diff - diff);
    }
    return result * ref_color.a;
}


void fragment() {
    if (active > 0) {
        COLOR.rgb = outline_color.rgb;
        COLOR.a = check_color(TEXTURE, UV, TEXTURE_PIXEL_SIZE);
    }
}
This makes the second texture only display outlines and when displaying this texture on top of the regular one the magic happens.
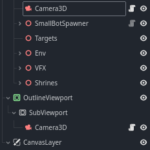
Attached there is a screenshot of the scene tree for doing all that. Here the Camera3D in MainViewport has a cull mask with only layer 1 active and the one in OutlineViewport has a cull mask with only the 5th layer on. The shader is applied to the OutlineView texture which is filled with the viewport texture of OutlineViewport/Subviewport. Every control is streched to full screen. Viewport containers are optionals they just make thinks easier to adapt the viewport to the window size.
You can find a screenshot of the scene tree organisation to make it all work.
* After thinking about it it may be because my quadmesh used for screen reading is drawn during the opaque draw pass, anyway it works with the texture and makes debugging easier.
Shader code
/*
 MESH RENDERING SHADER
*/
shader_type spatial;

#ifdef SHADED
render_mode diffuse_toon, specular_toon, shadows_disabled;
#else
render_mode unshaded;
#endif
#ifdef NODEPTH
render_mode depth_test_disabled;
#endif


const int mask_layer_val = 1;
const int outline_layer_val = 1<<4;


uniform vec4 original_color : source_color;
uniform vec4 outline_color : source_color = vec4(0.5,0.5,0.5,1.);
uniform sampler2D outline_mask : filter_nearest;
uniform bool use_mask = false;

void vertex() {
    // Called for every vertex the material is visible on.
}

void fragment() {
    if((int(CAMERA_VISIBLE_LAYERS) & mask_layer_val) != 0) {
        ALBEDO = original_color.rgb;
        #ifdef USE_ALPHA
        ALPHA = original_color.a;
        #endif
    } else if((int(CAMERA_VISIBLE_LAYERS) & outline_layer_val) != 0) {
        if (use_mask) {
            ALBEDO = texture(outline_mask, UV).rgb;
        } else {
            ALBEDO = outline_color.rgb;
        }
        #ifdef USE_ALPHA
        ALPHA = original_color.a;
        #endif
    }
}
Live Preview

Really love this. I figured out I can get it to ignore my world environment skybox by placing another sky environment on the outline camera.
A couple of questions:
Sorry for the late response.
The outline mask allows to have outline between faces of the same mesh. For example if you want a cube to have outline on all its faces you would need to set up a outline mask with a different color for each faces. It is not per say a mask i guess I named it badly.
This implementation does not allow different outlines for different meshes but I guess that could be done by tweaking how the colors are used. For example we could use only the red channel of the texture to detect if we need an outline or not and use the other channels for information on how the outline should be rendered. One could also render to different viewports with different outline settings but depending on how many different outlines you want you should probably go gor the first option.
Ps There should be a boolean parameter to enable the outline mask
Does this work with 2D?
I think with 2D you could reuse most of the ideas here but the mesh shaders won’t work. You would need to adapt a lot of it to make it work.